Swaging tools are a fundamental part of many industries, from metalworking and HVAC installation to cable assembly and jewelry making. These versatile devices allow professionals and DIY enthusiasts to form, join, and manipulate metals and cables with precision and strength. In this article, we will dive deep into what a swaging tool is, its various types, applications, how to use it correctly, and tips for choosing and maintaining the right swaging tool for your needs.
What is a Swaging Tool?
A swaging tool is a device used to alter the shape or diameter of a material—typically metal—by applying force, usually through compression or deformation. The process, called swaging, involves forcing a material (like a pipe, tube, or wire) into a die or against a surface to reduce its diameter, form a connection, or attach a fitting. Unlike cutting or welding, swaging joins or reshapes materials without removing material or using heat.
Swaging is valued for creating strong, reliable connections and customized shapes. The swaging tool itself may be manual, hydraulic, or even powered by air or electricity, depending on the specific application and required force.
Types of Swaging Tools
Swaging tools come in various sizes and designs, tailored to different industries and tasks. Major categories include:
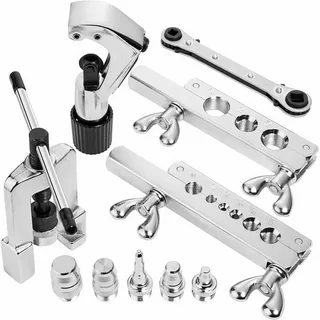
1. Manual Swaging Tools
Handheld and easy to use, manual swaging tools are common for light-duty applications such as:
- HVAC tubing connections
- Wire rope and cable crimping
- Jewelry making
They typically use lever action to provide the necessary force.
2. Hydraulic Swaging Tools
These use hydraulic pressure to apply greater force, making them suitable for:
- Heavy-duty cable and wire rope
- Large-diameter tubing
- Industrial fabrication
Hydraulic swaging tools are often used in marine, construction, and industrial environments.
3. Hammer and Anvil Swaging Tools
Consisting of a fixed die (anvil) and a hammer, this simple method is used for basic cable or tube swaging. The material is placed in the die and struck with a hammer to deform it.
4. Rotary Swaging Machines
These advanced machines use rotating dies to form or resize tubes and rods with high precision and speed. They are common in manufacturing for automotive parts, aerospace components, and medical devices.
Common Applications of Swaging Tools
1. HVAC Installation
In heating, ventilation, and air conditioning (HVAC), swaging tools are essential for joining copper or aluminum tubing. Swaged ends allow two tubes of the same diameter to be joined with a leak-proof connection, minimizing the need for fittings and solder.
2. Wire Rope and Cable Assembly
Swaging is widely used to terminate wire ropes and cables. Swage sleeves, ferrules, or stops are compressed onto the cable, creating strong loops or ends for rigging, lifting, sailing, or fencing.
3. Metalworking and Fabrication
Swaging tools form or reduce the diameter of pipes and tubes for custom fittings, automotive parts, or architectural components.
4. Jewelry Making
Small manual swaging tools crimp beads and findings onto wire or string for secure, decorative jewelry closures.
5. Aerospace and Automotive
Precision rotary swaging is used to form complex shapes or lightweight components in aircraft and vehicle manufacturing.
How to Use a Swaging Tool: Step-by-Step Guide
The specific process depends on the type of tool and material, but here is a general guide for manual swaging of tubing or cables:
1. Select the Proper Tool and Die Size
- Choose a swaging tool appropriate for your material’s diameter and type.
- Ensure the dies match the size of the tube or cable for a snug, secure fit.
2. Prepare the Material
- For tubing: Cut the tube end squarely and deburr the edges.
- For cable: Cut with a proper cable cutter to prevent fraying.
3. Insert the Fitting or Sleeve
- Slide the ferrule, sleeve, or fitting onto the end of the cable or tube.
4. Position in the Swaging Tool
- Place the assembly in the tool’s jaws or dies, lining up the area to be swaged.
5. Compress the Tool
- Squeeze the handles of a manual tool, or activate the hydraulic pump, to compress the die around the material.
- For longer sleeves, swage in multiple locations as recommended.
6. Inspect the Swage
- Check for proper compression—there should be no cracks, splits, or excessive deformation.
- For critical loads (e.g., rigging), test the swaged connection for strength.
7. Repeat as Necessary
- Complete additional swages as needed, especially for multi-part assemblies.
Benefits of Using a Swaging Tool
1. Strong, Reliable Connections
Swaged joints and terminations are often stronger than the parent material, providing high pull-out resistance and durability without welding or adhesives.
2. Time and Cost Savings
Swaging eliminates the need for threaded fittings or solder, reducing material costs and labor time.
3. Clean, Leak-Proof Joints
Proper swaging creates airtight and watertight seals in tubing, crucial for HVAC, refrigeration, and hydraulic systems.
4. Versatility
Swaging tools can be used with a wide range of materials and sizes, making them valuable in many fields.
5. Portability
Manual swaging tools are compact and easy to use on-site, ideal for field repairs and installations.
Choosing the Right Swaging Tool
When selecting a swaging tool, consider the following:
- Material and Diameter: Match the tool to the size and type of tubing, pipe, or cable.
- Force Required: For heavy-duty jobs, hydraulic or powered tools may be necessary.
- Application: Use specialized dies and tool designs for specific tasks (e.g., HVAC, marine, jewelry).
- Quality and Durability: Invest in reputable brands for consistent results and long tool life.
- Ease of Use: Ergonomic handles, clear markings, and user-friendly mechanisms make the job easier and safer.
Popular brands include RIDGID, Yellow Jacket, Swagelok, and Greenlee.
Tips for Safe and Effective Swaging
- Read Instructions: Always follow the manufacturer’s guidelines for your tool and materials.
- Wear Safety Gear: Use gloves and safety glasses to protect against sharp edges and flying debris.
- Check Compatibility: Ensure swage fittings and sleeves are rated for your cable or tube.
- Inspect Regularly: Check your tool for wear, damage, or misalignment before use.
- Perform Test Pulls: For critical applications, perform pull tests to verify swage strength.
Maintaining Your Swaging Tool
- Clean After Use: Remove debris and lubricant residue to prevent corrosion.
- Lubricate Moving Parts: Use light oil to keep hinges and dies moving smoothly.
- Store Properly: Keep tools in a dry, secure place to avoid rust and damage.
- Replace Worn Dies: Check dies for wear or deformation and replace as needed for best results.
The Future of Swaging Tools
As materials and manufacturing methods evolve, swaging tools are becoming more precise, efficient, and user-friendly. Innovations include:
- Digital Force Gauges: Ensuring optimal compression every time.
- Interchangeable Dies: Increasing versatility for different applications.
- Battery-Powered Swaging Tools: Offering portability and ease for fieldwork.
- Smart Tool Integration: Connecting tools with mobile apps for process tracking and quality assurance.
Conclusion
From HVAC installers and metal fabricators to sailors and jewelry makers, the swaging tool is indispensable for creating strong, reliable, and precise connections. By understanding the types, applications, and best practices for using and maintaining swaging tools, professionals and hobbyists alike can achieve superior results in their projects. As technology advances, swaging tools will continue to evolve, empowering users to tackle a wider range of tasks with confidence, safety, and efficiency.
Leave a Reply